Sennheiser SKP 30 Instruction Manual
Browse online or download Instruction Manual for Microphones Sennheiser SKP 30. Sennheiser SKP 30 Instruction manual User Manual
- Page / 30
- Table of contents
- BOOKMARKS
- INSTRUCTION MANUAL 1
- Contents 2
- 1 Short description 3
- 2 Special features 4
- 3 Areas of application 4
- 5 Operating controls 6
- 9 Muting the transmitter 10
- 10 Battery status indication 11
- 11 Operation 12
- 12 LC display panel 13
- / buttons feature a “fast 14
- / buttons, the display 14
- 14 Overview of menus 15
- / buttons and the ON/OFF 24
- 22 Error checklist 26
- 23 Tips for optimum reception 27
- 24 Safety instructions 27
- 25 Specifications 28
- Plug-on transmitter SKP 30 30
- ETS 300 445 30
- ETS 300 422 30
Summary of Contents
SKP 30 33 INSTRUCTION MANUAL
429 Muting the transmitterUse the MUTE switch to noiselessly mute the transmitter’s audio signal (this switch does not switch off the transmitter).
4310 Battery status indicationThe red LED and the 8-segment bargraph on the display provide information on the (remaining) battery capacity. 3-step
4411 OperationThe SKP 30 plug-on transmitter has been factory-preset to allow immediate use after switch-on. Please note, however, that the transmitte
4512 LC display panel Alphanumeric main display 3-step level display for battery status13 Basic functions of the Sennheiser operating menuThe SKP 30
462. Press the / buttons to adjust the settings of the selected menu:The new setting starts flashing on the display. If you return to the previous s
4714 Overview of menusDisplay Possible adjustmentsSEnSit Adjusting the sensitivity ( page 49)Att Selecting the sensitivity range ( page 50)PHAnto Sw
4815 Selecting a frequency memory – selecting a frequency and channel number With the / buttons you can directly switch between the factory-preset
4916 Adjusting the sensitivity (SEnSit)Close talking distances, speakers with loud voices or loud music passages may cause overmodulation in the trans
5017 Selecting the sensitivity range (Att)Condenser microphones and dynamic microphones require different sensitivity settings. The SKP 30 is therefor
5118 Switching the phantom powering on/off (PHAnto)The SKP 30 transmitter can supply condenser microphones with 48 V phantom powering (P48). Please no
34 Contents 1 Short description ... 352 Special features ..
5219 Selecting the content of the standard display (DiSPL)You can choose the content of the standard display i.e. whether the frequency or the channel
5320 Configuring a frequency memoryThe SKP 30 transmitter has 16 switchable frequency memories (presets) to store up to 16 transmission frequencies wit
54Setting a frequency (tunE)Transmission frequencies are tunable in 25-kHz steps within a switching bandwidth of 32 MHz max. Note: Detailed informatio
55Assigning a channel number (Ch no)You can now assign each frequency memory a channel number (from 0 to 255). With larger systems, we recommend using
5621 Activating/deactivating the lock-mode function (LOC)To prevent accidental programming or switching off during operation, we recommend locking the
57Deactivating the lock-mode function Select the “LOC” menu by pressing the SET button. “LOC On” appears on the display. Press the button to deact
5822 Error checklistProblem Possible causeNo operation indication Battery is flatNo RF signal Transmission frequency is not the same as the receivng
5923 Tips for optimum reception• Transmission range depends to a large extent on location and can vary from about 10 m to about 150 m. There should be
6025 SpecificationsModulation wideband FMFrequency ranges Range A: 518 – 550 MHz,Range B: 630 – 662 MHz,Range C: 740 – 772 MHz,Range D: 790 – 822 MHz,R
61THD (without attenuator at nom. deviation and 1 kHz)≤ 0.5 %Headroom (THD ≤ 3 %) 6 dBInput attenuator 20 dB, switchableMax. input voltage 2.8 Vrms(d
35 1 Short description The SKP 30 transmitter permits wireless transmission with studio-quality sound. The use of further optimised PLL and microproc
6226 EC Certificate of ConformitySENNHEISER electronic GmbH & Co. KG,Am Labor 1, D-30900 Wedemarkdeclare that the product Plug-on transmitter SKP 3
36 2 Special features • Diecast metal casing• State-of-the-art PLL technology, 16 switchable channels• HiDyn plus noise reduction system• Signal-to
37 4 HiDyn plus noise reduction Progress you can hear: This transmitter is equipped with HiDyn plus , the Sennheiser noise reduction system that
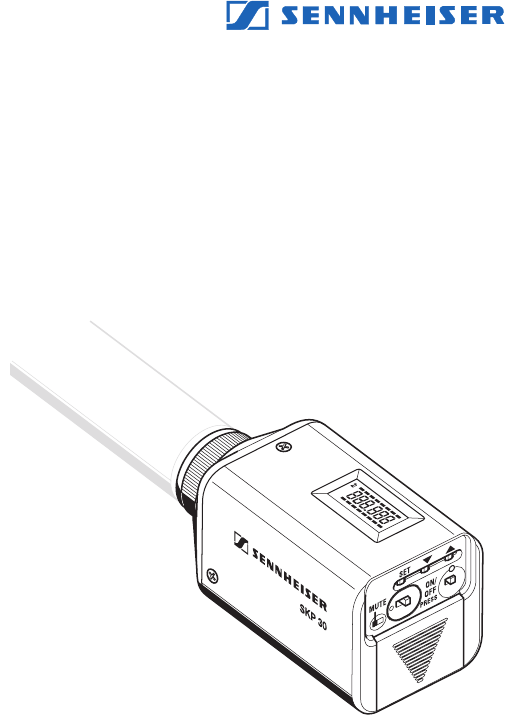
38 5 Operating controls Microphone input, XLR-3 socket Mechanical locking ring of XLR-3 socket LC display SET button button (DOWN)
39 6 Inserting and changing the battery Slide the cover of the battery compartment in the direction of the arrow until it clicks audibly and op
40 7 Plugging the transmitter onto the microphone Plug the transmitter’s XLR-3 connector onto the micro-phone’s XLR-3 socket. Tighten the loc
41 8 Switching the transmitter on/off Press the ON/OFF button to switch the transmitter on. The red LED lights up. For phantom powered c
Related products and manuals for Microphones Sennheiser SKP 30
 (35 pages)
 (12 pages)

 (24 pages)
© 2020, manymanuals.com. All rights reserved. | 2.111 s |
 Manymanuals.com
 Manymanuals.de
 Manymanuals.fr
 Manymanuals.it
 Manymanuals.pl
 Manymanuals.cz
 Manymanuals.es
 Manymanuals-pt.com
Comments to this Manuals